

How To Install Decking On Concrete Slab
How to Build a Deck Over a Concrete Patio
![]() Fourth dimension
Fourth dimension
Multiple Days
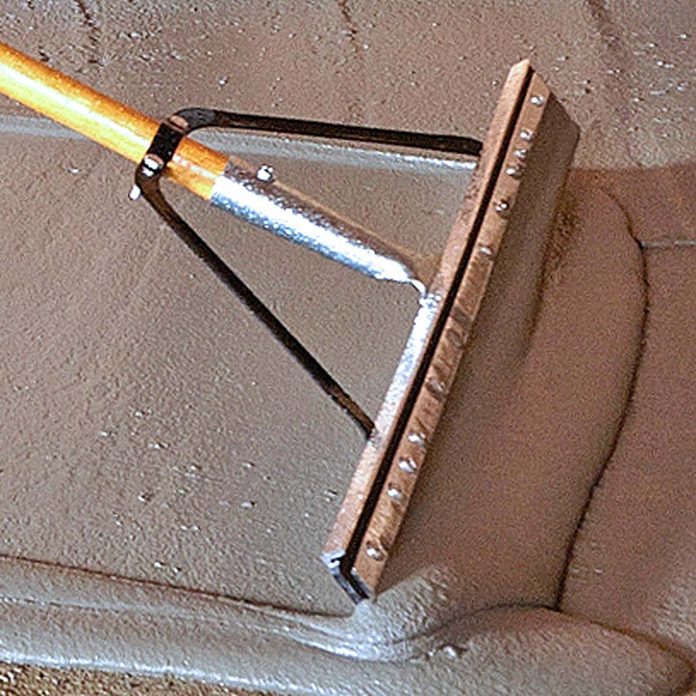
![]() Complexity
Complexity
Intermediate
![]() Toll
Toll
Varies
Introduction
Is your sometime concrete patio an eyesore? You tin avoid the toll and mess of violent it out by but screwing down woods sleepers and decking over it.
Tools Required
Materials Required
- 1/two-in. thick PVC trim
- 3/16 x 3 1/4-in. concrete screws
- Decking
- Flashing tape
- Plastic shims
- Self-leveling compound
- Treated 2x4s
Buy This PDF & Cut List
Earlier! A badly damaged concrete deck slab
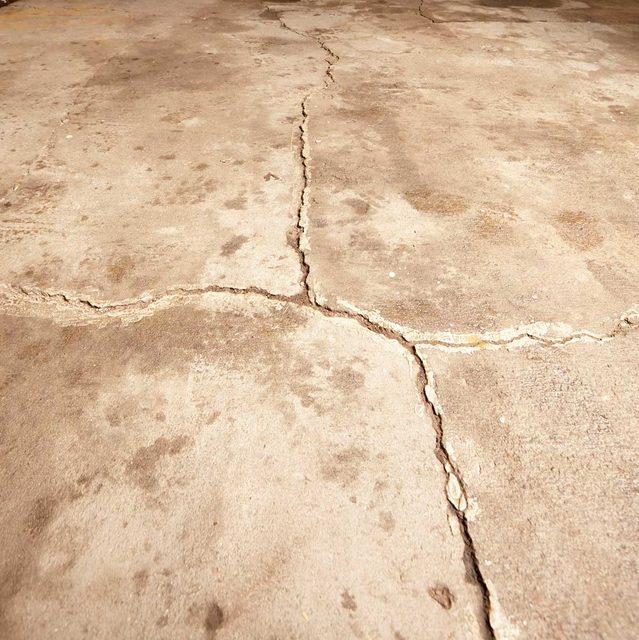
This was the ultimate bad patio: severely croaky and cratered, some areas raised past frost, others sunken after l years of settling. Originally, it was tiled, then the tile was chiseled off and the pockmarked surface got a coat of pigment. Luckily, we've got some not bad outdoor flooring ideas over physical, starting with building a deck!
A slab with this much harm can't be stock-still. But it can be covered up—and this commodity will bear witness you how. The results look merely like a deck, but getting them is much easier and less expensive than building a deck from scratch. In virtually cases, this project is also less expensive than a new patio installed past a contractor. Local contractors estimated costs of $7 to $10 per sq. ft. to remove this patio and pour a new slab. You could probably supercede your patio yourself for less than the price of this project, but DIY demolition and concrete pours are big, backbreaking jobs.
Will It Work On Your Patio?
Even if your patio is in terrible shape, you tin deck over it. Cracks, craters and seasonal motility along cracks are no trouble. Only beware of these three situations:
- If an area is badly cracked and sinks noticeably twelvemonth after twelvemonth, whatever decking you put over information technology will likewise sink and develop a depression spot. In virtually cases, settling concrete stops sinking eventually, so delay this project until information technology does.
- This project raises the level of your patio by 2-1/2 to iii-1/ii in. (depending on the thickness of your decking and whether or non you put spacers under the sleepers). And so any door thresholds adjoining the patio must be at least that far above the concrete. If non, this project won't work for you. If you live in a climate where the ground freezes, permit an extra 1/2 in. so that seasonal "frost heave" can enhance the slab without damaging the threshold.
- Stairs connected to the patio tin complicate this project. To keep step heights equal, y'all'll have to raise the treads past the aforementioned altitude you enhance the patio (ii-ane/2 to 3-1/ii in.). On concrete steps, that's a straightforward job: You can treat them just like the patio, screwing sleepers to the treads and risers and decking over them.
Projection stride-by-pace (sixteen)
Pace one
Building a Patio Deck Over Concrete: Time, Money and Tools
Time:Covering a patio with decking typically takes a weekend or two. This patio took much more time—v long days. That's partly because it's a large 1 (fourteen x 28 ft.). The grid pattern formed with different-colored decking too added a few hours to the job. Merely the biggest time cistron was the unevenness of the patio surface. All those ridges and sunken spots meant hours of tedious shimming under the sleepers to form a flat surface for the decking (see Photo three).
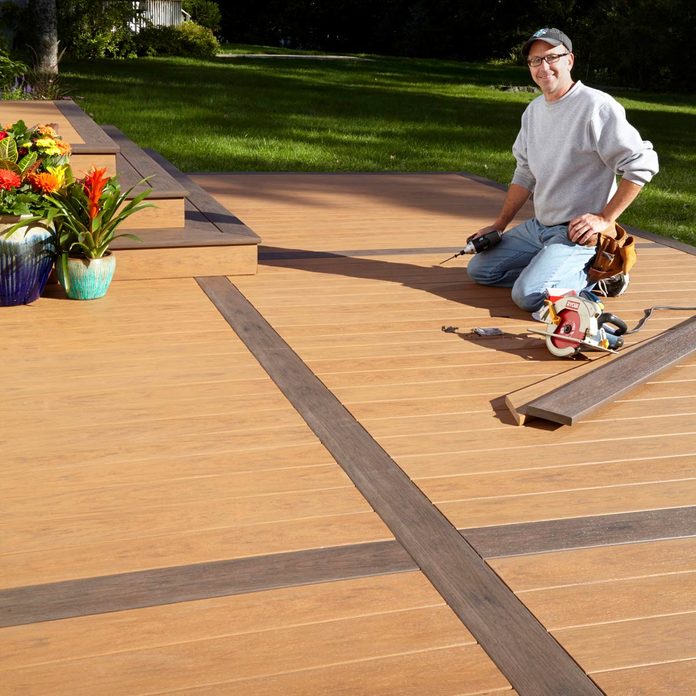
Cost: The cost of building a patio deck depends mostly on the decking you choose. Decking ranges from near $1.50 per sq. ft. for treated wood to more than than $10 per sq. ft. for a top-grade manufactured product. The other materials for this project add upwards to nearly $1.50 per sq. ft., so your total cost could be anywhere from $3 to $12 per sq. ft. For looks and immovability, we used 2 different colors of decking made from PVC, only there are less expensive alternatives.
Tools: Aside from standard carpentry tools, you'll need a hammer drill for this projection. You tin can get a hammer drill for less than $50 that volition practise the job. But consider spending $100 or more than. Even a very pocket-sized patio will require more than 50 holes, and a more powerful drill will make that chore a lot easier. Besides consider buying an impact driver. Impact drivers pack a lot more torque than standard drills or drivers and will bulldoze concrete screws much better. Almost models are cordless, only you can still find inexpensive corded models online.
Materials:Bated from the decking, here's an approximate of what you lot'll demand to cover 100 sq. ft. of patio. Exact quantities depend on the shape of your patio and the layout of the decking.
- 90 linear ft. of treated 2x4
- xc linear ft. of flashing tape
- Sixty 3/xvi" x three-1/four" physical screws
- 1/2"-thick PVC trim or deck fascia (for spacers), plastic shims, 3/16-in. masonry drill bits (minimum drilling depth of three-1/2 in.)
Step 2
Start with a Layout

The layout of your deck sleepers volition depend on the layout of your decking. If you want a standard decking design—all the deck boards running one direction—all you lot need are rows of parallel sleepers. If you want a more complicated decking design, like the one in this project, you'll demand doubled sleepers to support any boards that run perpendicular to the others (see Figure A). We as well installed sleepers to back up the steps we afterward added to the concrete stoop.
![]()
Step 3
Solve Water Problems Commencement
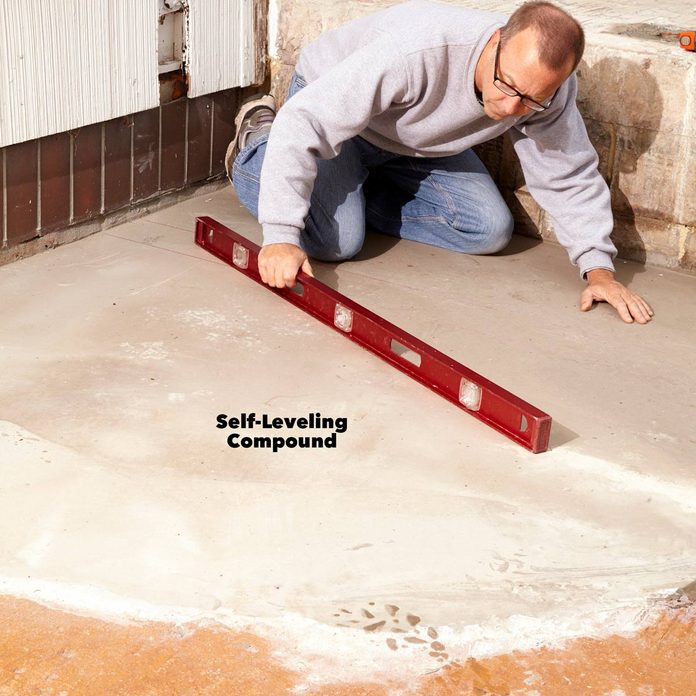
This corner of the patio had settled by more than than two in. over the years. That meant a big reservoir after rain—and h2o in the basement. Then we filled the reservoir with exterior-grade self-leveling compound. After the first batch hardened, we poured on a thin glaze and gave it a slight slope then water would run away from the business firm.
Self-leveling chemical compound hardens fast, so you tin can get on with the projection. Only information technology'due south as well expensive. If y'all're not in a rush, you lot tin become similar results for less than one-third the cost with concrete topping mix such as Sakrete Top 'n Bond or Quikrete Sand/Topping Mix.
We also took a couple of other water-fighting steps. To prevent water from seeping down along the foundation, we caulked the gap between the patio and the business firm. At the other cease of the patio, a corner of the slab had sunk slightly below the level of the soil and rainwater pooled there. To right that, we shaved off the sod with a spade, dug out a couple of inches of soil and replaced the sod.
Footstep 4
Tips for Working with Sleepers
Screwing downwardly sleepers with concrete screws is uncomplicated, but there are some things to go along in listen:
- Screws should penetrate the physical past at least 1 in., so iii-ane/four-in. screws are perfect. In low spots, where we had to stack up shims, we switched to 3-3/4- in. screws.
- As y'all drill, dust compresses around the drill scrap. That slows yous down, strains your drill and overheats the bit. To clear the dust, pull the bit completely out of the hole once or twice while drilling each hole.
- Drill the holes 1/4 to 1/2 in. deeper than the spiral will reach. Extra-depth provides a space for grit and dust, so screws are easier to drive.
- Have extra drill $.25 on paw. As a bit wears, it doesn't only drill more slowly; it also bores a slightly smaller hole and screws become harder to drive. We replaced each bit later near 40 holes. When all the sleepers are screwed down, take a few minutes to double-check for flatness. Set a 4-ft. straightedge on each sleeper, both beyond it and along it. If you find spots that are ane/16 in. or more out-of-aeroplane, back out the screw and add or remove shims.
Step 5
Lay the sleepers and predrill for physical screws
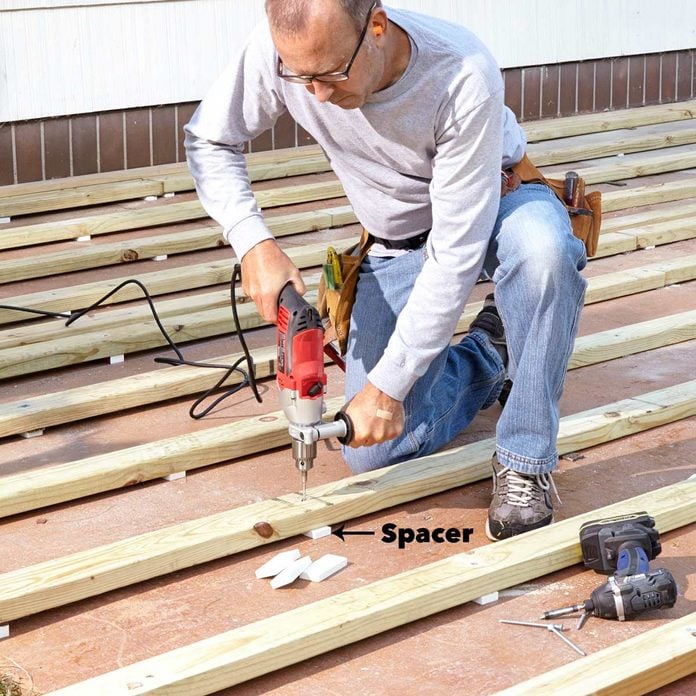
The sleepers don't have to exist level; they can follow the gradient of your patio. But they do demand to form a apartment airplane. If your patio is in good shape, y'all'll get a apartment plane automatically. If your patio has ridges and sunken areas, you'll spend lots of time fussing with shims.
To preview the state of affairs, lay a straight board across the patio in a few spots. Look for the highest hump in the patio and spike your first sleeper in that location. Then work outward from the high spot, adding sleepers and checking for flatness forth each sleeper and across them. Add shims to raise low spots.
Drill through sleepers, spacers and into the concrete with a hammer drill, so drive in physical screws. Overhang the sleepers along one border of the patio and trim them to exact length later.
Step 6
Screw down and flatten the sleepers
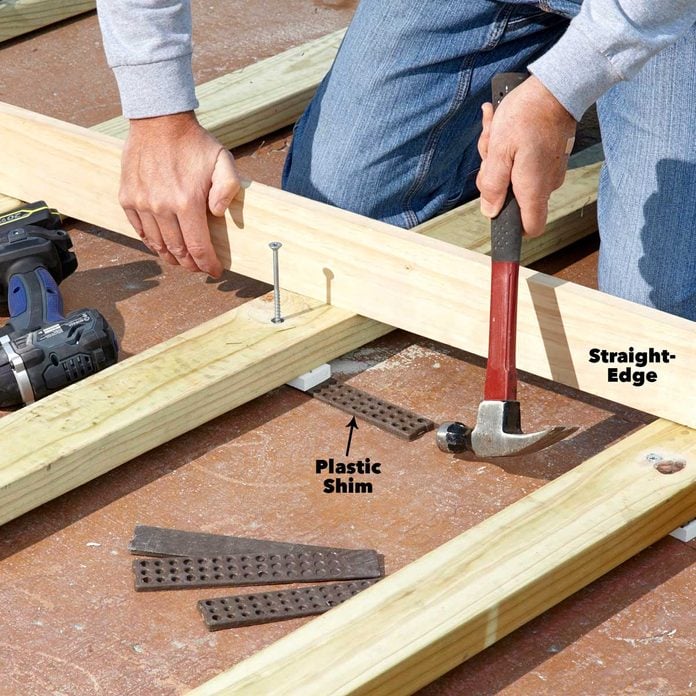
Check for flatness with a straightedge. Enhance low spots with shims. At high spots, skip the spacer; stack upwards shims instead.
Step 7
Why Utilize Spacers?
You lot could lay your sleepers directly on the concrete, but we bought a 1/2-in.- thick PVC trim board and cut spacer blocks from it. Here's why:
- Spacers let you lot run sleepers parallel to the house so decking can run perpendicular to the house (if that's what you prefer). A patio typically slopes away from the house so that water runs off. If you lot run sleepers parallel to the house and set them directly on the concrete, each sleeper will block runoff. Simply with spacers, water tin can run under the sleepers.
- Spacers let for longer decking screws. Nosotros wanted to employ Cortex screws, which come with cover plugs made from the same cloth as the decking. They're easy to use and most invisible. Simply they're 2-3/four in. long; that's too long to sink into our decking if nosotros use sleepers only.
- Spacers allow the sleepers dry out. If kept damp, common grades of treated wood volition eventually rot. Spacers keep the sleepers off the damp concrete and then they can dry out.
Step 8
Install the decking

Before decking, we covered the sleepers with flashing tape. Without it, water soaks the tops of the sleepers and the decking prevents the forest from drying. Common grades of treated lumber will rot if kept permanently damp, and flashing tape is the best insurance against that.
Installing deck boards over sleepers is just like installing them over standard deck framing. We began with the darker "emphasis" boards, screwing them into place temporarily to human action as guides for the "field" boards. When we reached the end of the deck, we removed the center divider lath and cut information technology to final length. Then we removed and mitered the border boards and trimmed the sleepers to final length.
To encompass the ends of the sleepers, we used a deck "fascia" lath made from i/ii-in.-thick PVC. We cutting the fascia into strips and screwed them to the sleepers.
Step nine
Keeping information technology simple: More ways to improve a patio
If you're a beginning DIYer, don't let all the details on our deck scare yous away. Your project can exist a whole lot easier if you cull a elementary decking design. The simpler yous tin make your deck plan, the faster and cheaper it will be to build.
Whether your patio is in bad shape or just bland, there are many ways to revive it. But before you weigh the options shown below, in that location'south one thing to consider…
The crack cistron: Cracks in your patio drastically limit your options. That'south because cracks tend to motion. Some grow wider over time, while others shrink and widen equally the soil freezes and thaws. Some become uneven every bit one side of the crevice sinks. Any movement happens so slowly that it's hard to observe. But if you know—or fifty-fifty retrieve—that you take moving cracks, yous accept to choose a patio upgrade that can "float" over moving cracks without condign damaged.
Step ten
Bury information technology under pavers

A concrete slab provides a business firm, stable base of operations for pavers. Cover the patio with a thin layer of sand, lay pavers over information technology, and the results look like a standard paver patio. It's a fairly uncomplicated project and the cost is reasonable ($3 to $six per sq. ft.), but await a weekend or two of hard labor. For complete stride-by-step instructions, encounter How to Cover a Concrete Patio With Pavers.
Step 11
Hide it under a rug
The quickest manner to hide damaged concrete—or but add color—is with an outdoor area rug. They're available in a huge range of colors, designs and prices. The largest rugs are typically 9 x 12 ft. That may not cover your entire patio, but only covering almost of an ugly patio makes a huge difference.
Stride 12
Snap-together tiles
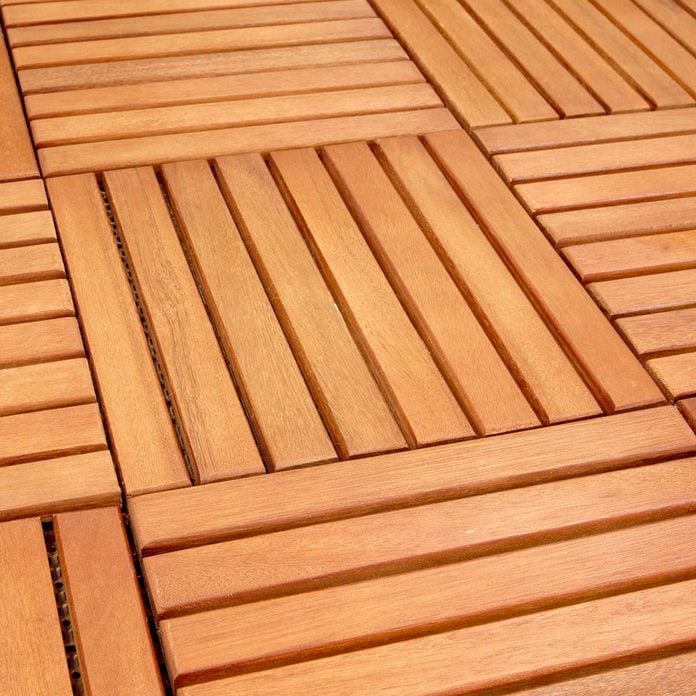
Interlocking plastic tiles only snap together; no need to spike them to the patio. Less expensive versions are plastic only. Others are topped with wood, ceramic or stone. (Ceramic or stone tiles require a flat surface—they may cleft if installed over ridges or depressions.)
Footstep 13
Projects for a crack-free patio
If your patio isn't cracked, you could choose whatever of the options below or stain, tile or resurface the physical.
Step 14
Stain it

A coat of stain followed past a coat of sealer transforms a patio in a weekend and is one of the least expensive options. But there are downsides: Yous'll have to reseal every one to three years and may eventually have to restain information technology. Also, the stain won't hibernate damage, and any repairs will likely testify through the stain. To see how to apply stain in multicolor patterns, see Renew Your Concrete Patio.
Step 15
Tile it
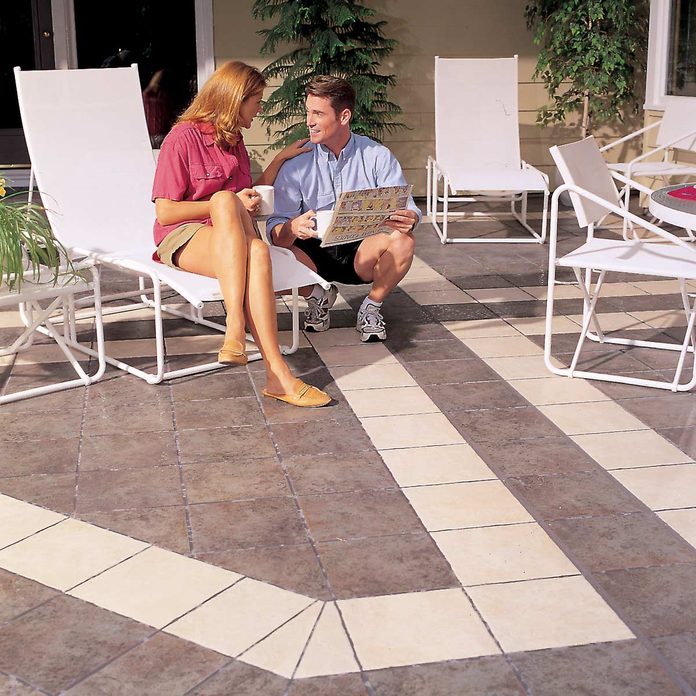
A concrete patio is a groovy foundation for tile. And tile is a great manner to turn a banal patio into a showpiece. The price depends generally on the tile you choose; the projection could cost $4 per sq. ft. or three times that. Freezing h2o can destroy outdoor tile, so if you live in a climate that freezes, pay actress attention to the details. For the complete story, see How to Build a Patio With Ceramic Tile.
Step 16
Resurface it
With a coat of resurfacer, yous tin make an old patio await like new concrete speedily and cheaply. Only mix the cement-based powder with water and spread it over the patio. You lot can repair cracks and resurface over them, only the cracks may return. Quikrete Concrete Resurfacer and Sakrete Flo-Coat are two common brands.

Source: https://www.familyhandyman.com/project/how-to-build-a-deck-over-a-concrete-patio/
Posted by: mainesdact1977.blogspot.com
0 Response to "How To Install Decking On Concrete Slab"
Post a Comment